Prepping Second Side Skin
Over the weekend I started preparing the port-side outer fuselage skin for installation. There are a few steps to do before installing it:
- Lightly abrade the skin near rivet locations (for better paint adhesion under the countersunk rivet head)
- Dimple the forward rivet locations
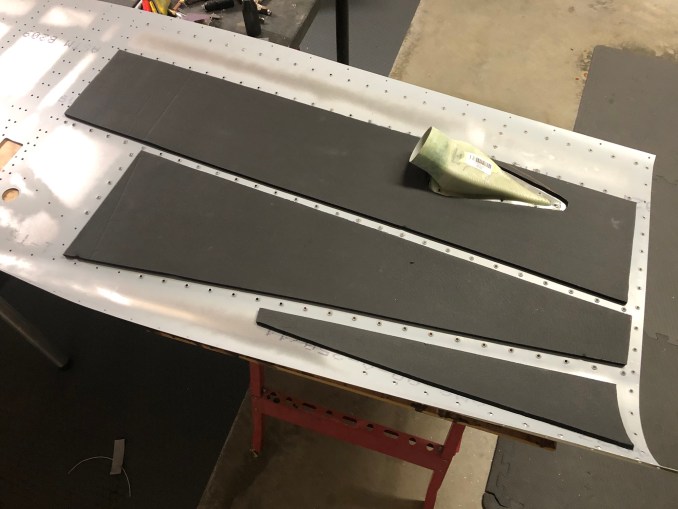
- Attach NACA duct
- Roll edges where they overlap other skins (bottom, aft)
- Attach insulation
- Mask and prime overlap areas
I also had a small wiring task to complete. I never finished routing the power and data line for the canopy lighting. I finished routing it out to the outer skin, where it then travels up through the aft-most longerons to meet up with the canopy.

For dimpling, I’m using a few tools that I bought from Aircraft Tool Supply during their Oshkosh week specials:
Since I don’t have a lot of holes to dimple, I didn’t want to invest in a Deep-Reach Dimple Tool (DRDT2), so instead I used an air hammer along with the die block set to create the dimples. The air hammer is a cheapie $10 variant from Harbor Freight, but I can’t argue with the results — the dimples are nice and crisp. I laid out the skin on a large work surface, and had the die block on a shorter bench just below the skin to ensure the dimple die halves would meet up normal to the surface of the skin.


As before, I used Dow 732 RTV sealant between the NACA duct and the skin. I also again used backing strips made of 0.020″ aluminum to support the rivets, since countersinking the thin edge of the duct removes too much material for countersunk rivets to work.

Before I went much further with the skin install, I wanted to make sure the 10mm x 170mm landing gear bolts would be able to easily slide into the holes on the uprights. There are other holes for large bolts where I had to use a reamer to open up the holes a bit. Luckily, no problems with the fit, as shown in the next photo.


