Comm Antenna Mount
Some number of months ago, I created a miscellaneous parts board, made from a recycled shipping container cover. It is home to a number of loose parts that are still in sub-kit bags, but either I haven’t needed the parts yet, or I haven’t figured out what they’re for.
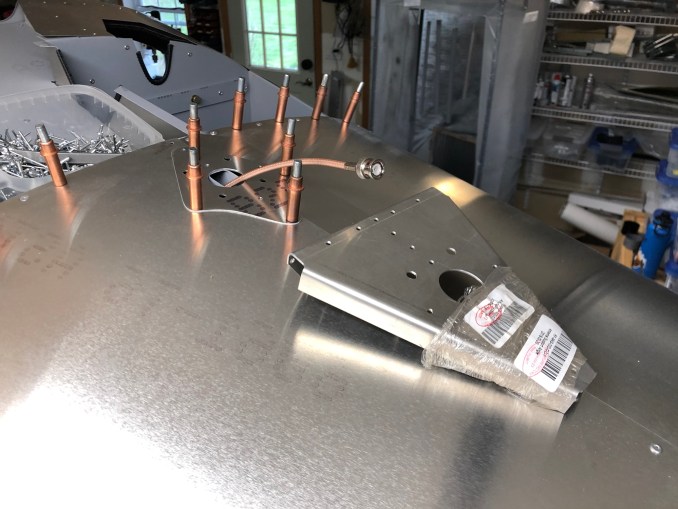
Having closed out most of the rear fuselage, I turned my attention to the comm antenna mount. I had the spade-shaped plate ready to install (part #4 in the first picture below), but it didn’t seem like it provided enough reinforcement for the antenna.
In the Sling TSi build manual page D20, the model shows what looks like a reinforcement plate, though it’s not mentioned anywhere nor does it show up on the parts list. Turns out, this is part RF-ANG-020-C-C-1, “Antenna Support Angle”, and it’s definitely needed. I happened upon a blog post on Craig M’s site, which confirms the need to install this plate. The Sling 4 build manual doesn’t mention nor show this part at all.

This reinforcement plate has been on my misc parts board, in a bag labeled “Longeron 1 Parts”, but I didn’t realize this part was for the antenna on the roof. You could say it was hiding in plain sight!


Since I had made progress on closing out the rear fuselage, it was going to be a pain to install this plate. Luckily, I hadn’t fully riveted the upper skins, but still I had to drill out a good number of rivets to get enough access to put in this plate. The tails of the rivets fall off when you drill them out, so I had to drill out even more rivets to gain access to the floor of the rear fuselage so that I could vacuum up all the rivet tails. I also had to remove (tear!) some carpeting in the luggage area, since this carpeting was attached to this upper skin. About 2 hours of negative progress in total.


The mounting location seems much stiffer now, and much more suitable for installing an antenna. I will probably leave this skin clecoed for a few more days, to make sure I don’t discover anything else missing.